electrolux vacuum reviews

Probably the Electrolux Vacuums reviews have given you all the information you need to know about the impressive vacuum cleaners of this leading brand.

But have they given you the guidance about factors that you need to look into while getting your next Electrolux Vacuum?

We’re assuming the answer is a big NO as reviews were just telling what the tech does, but not how to pick the right one.

Well, don’t worry; we’re about to get that part covered. All you need to do is just scroll a bit down to check what’s waiting below.

Considerable Aspect While Choosing an Electrolux Vacuum

According to Allgreatvacuums.com the brand Electrolux, doesn’t bring in a single one but three different types of vacuum cleaners in their product line. So, the factors that make an Electrolux vacuum pickable varies on the basis of that. Let’s check them out then?

Upright Vacuums

If you’re looking for vacuum models that are popular and also come with additional parts like hoses, upright vacuums are the right ones for you. The additional hoses make it easier to reach not only any part of the floor but also elevated surfaces.

The best thing about this type of vacuum is they come with a wide yet powerful cleaning path. This means you can easily clean up larger areas within a short time. If you’re planning to clean hard surfaces, rugs, and bigger carpeted areas, then this one type can be the perfect pick.

Now, the question is, what should you look into when you’re planning to get one from Electrolux? Well, here’s your answer.

  • Suction Power

First of all, look into the suction power as that’s what is going to be the most useful feature when it comes to cleaning. For upright vacuum cleaners, 180 to 200AW is perfect. But if it’s cordless, 80 to 100AW will be enough.

  • Bin Capacity

It’s always better to go with the higher number. But if you’re looking for an ideal number, then we’d say try to pick something with 0.75 – 1 liter capacity.

  • Air Filtration

It plays a vital role in preventing the dust from spreading around that you’ve just sucked. The best one so far we’ve seen for that role is the HEPA filter. So, try picking something that includes one.

  • Noise

For obvious reasons, noise is an irritating part of vacuum cleaners. So, when you’re getting an upright vacuum, make sure that it doesn’t exceed the noise level of 70-80 dB.

  • Weight

As you’re going to carry the vacuum around, pay some attention to the weight too. Don’t go for anything that exceeds 13-18 lbs.
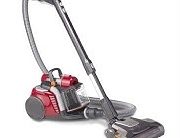
Canister Vacuums

If you’re more into cleaning hard surfaces, stairs, or smaller carpeted areas, then canister vacuums are probably what you’re looking for. This type of vacuum is high on cleaning and suction power.

And yes, it comes with the bagless and bagged option, which gives the user a scope to pick the preferred one. But what we like the most about it is flexible hoses that can reach almost anywhere.

Like any other vacuum cleaner, this one too has certain aspects that you should look into.

  • Suction Power

Higher suction power is always preferred when you’re asking for powerful suction performance. Try to get something with a suction power of around 300AW or more.

  • Bagged or Bagless

Prioritize your preference here. The bagged one can keep the mess to the minimum. On the other hand, the bagless ones are more cost-efficient.

  • Telescoping Wand

The best thing about telescopic wands is – it makes reaching difficult places easier. So, before you swipe your card, check if the vacuum cleaner’s wand is telescopic or not.

  • Corded or Cordless

If you’re getting a corded one, check the length of the cord as a small cord can restrict your movement. And if you’re thinking about getting a cordless one, check out its run time in all the modes.

  • Canister Capacity

Like the upright ones, you need to have an eye on the canister capacity. 1 liter is more of an ideal number for this type of vacuum cleaner. And yes, also check if the canister can be washed or not.

Stick Vacuums

When you’re asking for something efficient for cleaning up a small floor or surface, this type of vacuums can be really helpful. Their smaller size and lighter weight have made them simply handy.

Besides, due to having longer handles, reaching tough spots becomes easier. On top of that, as some of the stick vacuums are battery-powered, you can roam anywhere in the house with it without looking for a power outlet.

But while picking one of those, you need to make sure that you’re checking out its following aspects.

  • Cordless or Corded

When you’re in need of a cleaning tech for longer cleaning sessions, we say you better go with corded ones. That’s because the batter-powered one might run out of juice in a while where the corded ones can keep going.

  • Weight

Try to pick something within a weight of 3 to 6 lbs. The reason is – the lighter it’ll be, the easier it’ll be to handle.

  • Run Time

There are two types of run time – in the minimum mode and high mode, when it’s the battery-powered one, of course. With high mode, it takes more power and runs for less amount of time. 15-20 minutes is a decent amount of time there.

On the other hand, when it’s in the minimum mode, it’ll require less power and run for longer. The time can be something like between 45 to 60 minutes. Don’t think about getting a cleaner less than this.

  • Charge Indicator

When there’s a battery powering the cleaner, the need to have a charge indicator pops up. So, if you feel like you need that as well, pick a cleaner with one.

  • Bin Capacity

As the cleaner itself is kind of small, the bin capacity will be low too. But don’t think about going for anything with less than around 0.5L bin capacity.

  • Noise Level

For stick vacuums, 60 dBA is a comparatively tolerable noise level. So, try to stick to it while buying one.

  • Nozzle Headlight

This type of cleaner is good at handling narrower spots. But without some light, that might be a little tough. So, having a nozzle headlight might make things a lot easier.

  • Detachable Handset

Try choosing a cleaner with a detachable handset. After all, it can make small cleaning tasks way easier than it already is. With that, you can turn it into the same handheld vacuum in no time, which will be more convenient to handle.

Bottom Line

None of the Electrolux Vacuums reviews can fully be useful if you don’t know how to pick one. We hope we’ve got that part covered, as now you know what factor you actually need to put into your list of ‘cross checking’ before you swipe that card of yours.

plant-fertilizers

Plants need a lot of care and attention. Aside from making sure that they are getting enough time in the sun and watering them on a regular basis, it is also vital that you give your plants enough nutrients. After all, well-fed plants are generally more productive and more beautiful precisely because they are healthier. This article delves into the basics of plant fertilizers and their use. It explains why you need to do it in order to ensure the health of your plants. It also touches on the debate on whether one should use organic or synthetic fertilizers.

Plant Fertilizers Basics

People need to understand the importance of fertilizers in terms of encouraging healthy plant growth. It always comes as a surprise to many that most soil types are actually unable to provide all the essential nutrients that the plants need. Even if you have great quality garden soil to begin with, the nutrients it provides surely cannot last forever.

This is because, as your plants grow, they also absorb the nutrients embedded in the soil. Over time, the soil becomes less fertile. This is because the plants you are growing need those nutrients to build their tissues. One of the main purposes of fertilizing your garden, therefore, is to replenish the nutrients from the soil that have since been consumed. This is the only way to ensure that your plants have enough food to successfully thrive and flourish.

Organic vs. Synthetic Fertilizers

Some people don’t understand the difference between organic and synthetic fertilizers. Keep in mind that organic fertilizers are made from naturally occurring materials like plant meal, composted manure, and bone. Synthetic fertilizers, on the other hand, are made from chemically processed materials. Of course, for them, it does not really matter, as long as the plants get the nutrients they need. However, if you truly care about your plants, then you must have an understanding of how these fertilizers work.

They differ in mainly in the way they provide nutrients for the plants. On the one hand, organic fertilizers contain nutrients which are non-soluble in water. They can last for long periods of time as they are released to the plants slowly over the course of months or even years. Because of their composition, these fertilizers can improve soil structure and stimulate beneficial microorganism growth. More often than not, organic fertilizers should be able to provide all the nutritional needs of your plants.

On the other hand, synthetic fertilizers are water-soluble. This means that the plants can absorb their contents at a much faster rate. However, it does have its downsides as too much of these fertilizers can actively harm your plants. They also do nothing in terms of improving the other aspects of the soil such as texture and long-term fertility. There is also the risk of the fertilizer leaching into nearby water sources because its composition is highly soluble.

This article presented an overview of plant fertilizers and how important they are for your plants. It also differentiates between the two types of fertilizers available on the market today.

Gardening Basics: Common Seed Problems

Most people believe that gardening is as straightforward as they come. Nothing could be further from the truth. In fact, there are a lot of unexpected things that could happen to your seedlings when you are just starting out. This article presents a couple of these common seed related problems that all gardeners will encounter at some point. It also presents some tips on what you can do if you find yourself in such circumstances.

Poor seed germination

It is a well-known fact that most common vegetables and flowers can germinate readily on their own. However, other types of plants suffer from poor germination rates. This information is readily made available in the seed packet itself. The suggestion to sow an extra seed should be taken as a warning.

This problem is often caused by several external conditions such as the dampness and the temperature of the soil. It cannot be too cold or too wet. It can also be the opposite as too much heat will prevent the seed from absorbing the necessary amount of moisture needed to sprout. Of course, this problem can also be caused by older improperly stored seeds.

To address this problem, we recommend that you make full use of a heating mat. This handy gardening accessory will ensure that your soil stays at the optimal temperature to encourage plant germination.

Damping off

Damping off results in your seedlings keeling over at the side, as if it has been cut down at the soil line. This particular problem is caused by fungi coming out of the soil. This particular fungus attacks the stem itself. Unfortunately, there is no cure for this problem. The seeds will now be unable to sprout for a second time.

The only thing you can do now is to start over from scratch. This is why it is vital that the containers you use, as well as the seed-starting mix, are clean and sterile. That is why we recommend that you purchase containers specifically designed for your purpose instead of recycling used containers.

Pale Seedlings with weak stems

At first glance, one would be confused what is wrong with these leggy seedlings. More often than not, they are the direct result of an inadequate lighting situation. This simply means that your light source lacked intensity or that the plant was not exposed to it for the optimal amount of time.

As you know, plants need light not only to survive but to thrive. That is why you need to ensure that your light bulb is strong enough to stand as a substitute for the sun. For this job, we recommend that you make use of fluorescent bulb as it possesses the desired intensity without giving off too much heat that can severely damage the plant’s foliage.

In addition to this, you need to ensure that the plants are placed directly under the glow of the lights. Place the bulb a couple of inches above the foliage for maximum effect.

These are just a few of the problems beginners encounter with their seedlings. Most of the time, you can solve these problems by making use of the necessary products for the job.

Find more info here http://www.bentham-open.org/home-and-garden-decor/

Also see: Chia Seeds – Why They Are Good for You

composters

Composting is an important element to any home gardening project. Not only does it give you an easily accessible source of organic fertilizer, it also lets you do your part for the environment. This is because composting is perhaps the best way to get rid of biodegradable materials.

Of course, when it comes right down to it, it is virtually undeniable that we have come a long way in terms of how we compost. Gone are the days of simple backyard compost piles. Nowadays, home gardeners have the ability to make better composts with much greater efficiency and simplicity.

Why Should You Start Composting?

Before anything else, readers need to understand the importance of their composts. Needless to say, composting is a crucial aspect to any home gardening plan. This is because they give you a sustainable source of organic fertilizer for your garden.

Most people are unaware of the fact that most garden soil does not have enough nutrients to sustain plants on a long-term basis. This is why it is vital that you make full use of organic fertilizers to pick up the slack. Well-fed plants, after all, are generally more productive and easier to look at than those that are not.

Continuous Composters

Continuous composters are made from enclosed bins which are meant to handle all sorts of materials. This can range from your kitchen scraps to the yard waste. Due to the fact that they are sealed with a lid, rodents and other unwanted critters should be no problem at all.

These composters are earned their name because it lets you add materials to the pile at any given time. The compost generation process itself can take some time, however. There is also a finished compost filter at the bottom of the bin which you can remove every now and then.

Batch Composters

Batch composters are perfect for gardeners looking to get more compost as quickly as possible. However, this particular type of compost can also be demanding in terms of planning and effort.  Without a doubt, a batch composter is the quickest way for you to create your own compost.

The tumbling action is what makes this particular composter into an efficient machine. The simple action can dramatically accelerate the whole composting process. To give you a better idea of how efficient it is, imagine harvesting the final product in a short a time as four to eight weeks.

OF course, readers also need to be aware that using this particular composter entails some level of responsibility. The composters need to be turned on a daily basis. You will also need to regularly check for sufficient moisture. As you prepare one batch, you can already start amassing the materials you will be needing for the next one.

This article discusses the different ways to compost. In particular, it delves into the two main types of composters. It explains briefly how the continuous composters and the batch composters differ from each other. It also explains the fundamental importance of the compost for your home garden.

These suggestions and more gardening tips can be found at https://www.onlineshopper.us

products-you-need-for-your-home-garden-decor

Starting your own home garden actually takes a lot of time. While it can be a bit time-consuming, it is certainly time well-spent. Of course, it is worth noting here that you will need to prepare a couple of things as you start on your new project.

This article presents everything you will need for your home garden project. It also explains everything you need to do to make sure that your plants thrive.

Plant Containers

First, you will need to prepare the containers for your plants. You can make use of any type of container just as long as it is at least 2 to 3 inches deep. It also needs to have some drainage holes. Of course, you can easily purchase these at any gardening store in your area. However, if you are in the mood for a bit of DIY, then you should make use of yogurt cups, milk cartons or paper cups as a place to put in your seedlings.

Potting Soil

It is vital that you choose the right type of potting soil. Keep in mind that you cannot use soil from your garden. You also cannot re-use the potting soil from your houseplants. Instead, you need to get a fresh, sterile potting soil mix that is specifically designed for seedlings. This is the best way to ensure your seedlings are able to grow healthy and free of diseases.

Despite its name, the best types of “potting soil” for seedlings do not actually contain soil. Rather, it is a sterile, free-draining mix that contains few, if any, nutrients.  This means that you will have to supplement it with fertilizer for the next couple of weeks.

Seeds

It is vital that you check the seed packet and follow the instructions as closely as you can. More often than not, the ideal soil depth is indicated on the packet. For instance, some of the smaller seeds would be fine even if you just sprinkled them right on the surface of the soil. However, when it comes to larger seeds, you will need to bury them deep in your soil.

Light Source

Now that you everything ready, it is now time to look into the light source for your seedlings. As you know, younger plants will need a lot of light if you want it to grow healthy. Of course, you have the option to go with the natural way and put your plants growing on a windowsill. Remember that the window you choose should be facing the south for optimal exposure. You will also need to rotate the pots regularly to prevent the plants from leaning into the light.

On the other hand, if you plan on growing your plants under artificial lights, then it is vital that you get the right bulb. Fluorescent bulbs work best because of the amount of heat that they emit. Just make sure that it is placed a few inches above the foliage of the seedlings.

These are a few of the things you need to prepare for your home garden decor. Make sure that follow the directions indicated in this article to get optimal results.

Visit https://www.onlineshopper.us for more Home, Garden and Yard Decorations today

There is no better way to relax than having your own indoor garden at home. A bit of green always serves to spice up any space, giving it a vibrant atmosphere. Of course, starting your own garden is often easier said than done. There are a lot of things that you have to take into consideration.

For instance, you have to get a good batch of seed mix to plant. Then, you need to have a good watering routine. However, perhaps the most important aspect here is the light source. This is because the proper lighting is vital if you want your seedlings to grow healthy and stocky.

Of course, it should please readers to know that artificial lights, when used correctly, can ensure that your seedlings thrive. This article seeks to help readers find the right kind of light for their home garden. It provides a couple of key points to consider.

Light Intensity

As you probably know, all seedlings require bright light to ensure proper growth. If they do not receive enough of it then you will notice that they can get tall and leggy. Keep in mind that placing your plants by the sunniest windowsill in your home is often not enough.

This is why we highly recommend that you put your plants under fluorescent lights. These bulbs offer the best solution to your problem as they can serve as a high-intensity light source. By growing your plants under these lights, you can effectively control the light intensity in two ways: the wattage of the bulb and its proximity to the plant’s foliage.

Keep in mind that these fluorescent bulbs are ideal because of the small amounts of heat they give off. The story is altogether different with regular incandescent bulbs that can get a bit too hot for the seedlings which can burn the plant’s tender foliage. That being said, it is ideal that you place your fluorescent bulb at a distance of 2 to 3 inches above the foliage. As your seedlings grow, you can adjust the distance of the fluorescent light fixture accordingly.

Duration of Light

It is worth stating here that the point of your light source is to recreate the natural light cycle and to give your plants their necessary time in the light. That being said, if you are planting vegetables in your indoor garden, you should keep in mind that you will need to give them around 14 to 18 hours of light each day.

Conversely, your plants will also need their rest period. That is why you will also need to turn off the light after enough time has passed. In most cases, seedlings need to have eight hours of darkness. Consistency is key here. That is why we highly recommend that you make use of an automatic timer. This way you will not have to worry about overexposure.

This article presented a couple of things you need to keep in mind when setting up the lighting for your indoor garden. Just make sure that you get the right bulb for the job.

Leaf blowers terminology

Leaf blowers are a very important garden tool. All homeowners understand its important role in ensuring that one’s lawn and driveway area stays in the best possible shape. However, not many people know that there is actually a whole language that one needs to understand in order to get the best leaf blower for your needs.

Leaf blowers are commonly examined through the strength and power levels. There are specific ways to measure these aspects of the machine. One needs to pay close attention to the blower’s CFM, MPH, and CC. Aside from that, it would also be helpful if you have an idea of the different engine types used in these machines.

This article delves into the meaning behind these terms. It tries to explain the concepts in the simplest way possible so that the readers can easily understand it.

Engine Types

Once you start shopping for a leaf blower, you will probably notice that there are two kinds of engines, namely, the 2-cycle and 4-cycle engines. The differences between these two are pretty simple. First, the 2-cycle engines have the potential to be more powerful than their 4-cycle counterparts if you are able to maximize its power and weight ratio.  It is also lighter and easier to clean. On the other hand, 4-cycle engines are more fuel efficient.

Important Terms to Remember

The terms listed below are commonly used by blower manufacturers to describe their products. Make sure to keep these in mind as you look at the different leaf blowers available on the market today.

  • CC – The term CC is actually a unit of measurement. It indicates exactly how large the engine of your leaf blower should be.
  • MPH – MPH, or miles per hour, refers to the wind’s speed as it travels to the end of the nozzle.
  • CFM – CFM, on the other hand, is short for cubic feet per minute. It refers to the volume of air that is pushed out of the end of the nozzle. Keep in mind that this is probably the best way to measure the actual power of your leaf blower, as opposed to its CC or its MPH.

It is vital that readers understand the importance of these three terms. It would be ill-advised to take these elements separately. Rather, it is important that you understand the interplay between these units as power, speed, and engine capacity will all have a lasting impact on the way your leaf blower works.

A full understanding of these terms could certainly serve you well as you search for your next blower. That being said, it is vital that you examine the different leaf blowers in the market by these standards.

This article delves into the language used by the leaf blower companies. We are, of course, referring to the terminology used by the manufacturers of the machines. As consumers, it is vital that you understand what each of these terms means. This is the only way to guarantee that you get the leaf blower that is perfect for you.

Find more info here http://www.bentham-open.org/understanding-different-types-leaf-blowers/

Best Backpack Leaf Blower

Homeowners with a big yard should seriously consider getting a backpack leaf blower. It is vital if you have a lot of yard debris and trash to get rid of. This is because they have a lot more power in their engines, compared to the handheld leaf blowers.

However, with the sheer number of products out there right now, you might have a hard time finding one that will prove to be a worthy investment. This article seeks to help readers with that by providing a brief introduction to the best backpack leaf blower options available in the market today.

Husqvarna 560BTS 65.6cc 2-Stroke X-Torq Gas Powered 232 MPH Backpack Blower

By taking a quick look at the Husqvarna 560BTS 65.6cc 2-Stroke X-Torq Gas Powered 232 MPH Backpack Blower’s specifications, one can quickly surmise that it packs a lot of power. However, this should come as no surprise considering that it is actually a commercial-grade model leaf blower. Yet, it has also been made accessible to regular consumers. If that does not interest you, we do not know what will.

One of the best things about this particular model is the amazing X-Torq engine. This particular engine not only ensures better fuel efficiency but it also drastically reduces the level of emissions excreted by the engine. Needless to say, this leaf blower is more environmentally friendly compared to other models available in the market today.

It is also worth noting here that this leaf blower is very ergonomic in its design. It feels extraordinarily comfortable in your hands. This is because the handles ensure that your hand does not tire in spite of prolonged use.

Makita BBX7600N 75.6 CC 4-Stroke Backpack Leaf Blower

The Makita BBX7600N 75.6 CC 4-Stroke Backpack Blower is another one that deserves your attention. Similar to the previous leaf blower presented in this article, this is actually a powerful commercial model that has been introduced to the mainstream market.

We highly recommend that you give this a try if you a huge yard to clear. Otherwise, all that power would be wasted on smaller tasks.

Husqvarna 350BT 50.2cc 2-Cycle X-Torq Gas Powered 180 MPH Midsize Backpack Leaf Blower

One of the first things you will notice about this particular model is how light it is. The importance of this cannot be overstated, especially if you plan on using the machine for extended periods of time. This is no easy feat as the leaf blower has a powerful 2-cycle engine to its name. The fact that it is so lightweight should serve as proof of how well-designed this leaf blower is.

Another thing we love about this gas model is its fuel efficiency. This means that the money you spend on gas should last longer than with other leaf blowers. This is all thanks to its X-Torq engine.

This article presented some of the best backpack leaf blowers available in the market today. After all, we understand that navigating the best leaf blower market can be quite a challenge, especially if you have no idea what to look for. We hope that the information provided here would be of assistance.

Off Season Storage Guide for your Leaf Blower

As autumn draws to a close and you finish another busy season of cleaning the yard, you need to ensure that you pack everything up correctly. After all, your leaf blower is still a piece of equipment that needs to be properly handled. Needless to say, you need to take the necessary precautions and store your leaf blowers correctly. Failure to do so can create problems down the road.

This article teaches readers everything they need to know about proper off-season storage for leaf blowers.

Materials Needed

Before anything else, it is vital that you prepare all the materials you will need as you. Here is a list of everything you need to have:

  • Detergent
  • Clean water
  • Old towels
  • Used motor oil receptacle
  • Fresh motor oil
  • Spark plug wrench
  • Funnel
  • Gas can

Draining and Replacing the Oil

For 4-cycle engines, you will need to drain the oil. This is so that the engine crankcase is properly protected and insulated from prolonged exposure to oxygen which can be rather detrimental. As you probably know, 2-cycle leaf blower engines do not have a crankcase as the gas and oil are mixed together.

To do this, you will need to start the engine and let it warm up for a while. This is vital as the heat will make the liquid flow out easier. A 10 to 15-minute interval should be enough for that. Afterwards, you can proceed to drain the oil from the crankcase.

Once that is done, refill it with some fresh engine oil.

Cleaning the Air Filter

Over time and extended use, the small engines of your leaf blower will get clogged with dust. It is vital that you perform preventive maintenance at the end of the season. To do this, simply remove the air filter and give it a good washing. Make sure that you rinse it with a warm water and dish detergent solution.

Draining the Gas Tank

First, you will need to drain the gas tank completely into your gas can. Then, once that is finished, turn on the engine and let the engine run itself dry.  It is vital that readers understand the importance of this step. By draining the engine of fuel, you are essentially preventing any chances of gas evaporating and varnishing the insides of your carburetor.

As any expert would tell you, a carburetor with gas residue in it could lead to severe problems. You may even have a hard time starting the engine altogether.

Remove the Spark Plug

To remove the spark plug, make sure that you have a spark plug wrench. Once that is done, put a bit of oil directly into the spark plug socket. Then, slowly pull on the engine’s starter cord a few times. This should help prevent rust from building up inside as the oil that you just applied over the valves will have been spread.

Once that is done, you can put the spark plug back or replace it, if necessary.

These are the steps that everyone needs to follow in order to ensure the safety of their leaf blowers during the off-season. Make sure that you keep them in mind the next time you put your blower away.

Things to Look for When Buying a Leaf Blower

Most people think that shopping for the best leaf blower is pretty straightforward. However, like with all other products, not all leaf blowers are made the same. The fact of the matter is that there are a lot of things one has to look into.

Type

Not all leaf blowers are made the same. In fact, they can be categorized into two distinct categories. First, there is the handheld type. This is perfect if you only have a small area to work in. While not as powerful as its counterpart, it can certainly get the job done.

The second type is the backpack leaf blower. With enough power to generate winds with a speed of 250mph, it is considered to be a tool for more serious tasks. Consider getting one if you have to work in an area larger than 1 acre.

Engine

Most people do not realize that they actually have a choice between Two-Cycle and Four-Cycle Engines for their leaf blower. To make things simpler, here is a quick explanation of what to expect from each of these engine types.

  • 2-Cycle Engine – These engines require a mixture of gas and oil in the fuel tank to work properly. As to be expected, this type of engine is lighter. It is also much easier to maintain. If you are looking to purchase a leaf blower with this type of engine, consider making the most of the power-to-weight ratio
  • 4-cycle Engine – Essentially, these engines have a lot in common with engines found in your car, with gas and oil going into separate containers. The best thing about is that these engines are significantly more fuel efficient. This means the money you spend on every tank of gas is able to last longer. Additionally, these engines are capable of producing more overall power.

Ergonomic Design

The way your leaf blower is designed is of utmost importance. Ideally, it should be so that you can put on the equipment without any trouble. It should also be adaptable to the way you move. These are vital if you wish to avoid repetitive stress injuries.

As a basic rule of thumb, when looking at a backpack leaf blower, you need to ensure that it has a full tension support system. This is necessary because you will want it to distribute the weight evenly across your back. By doing so, your shoulders should be relieved of any undue pain as it prevents the onset of fatigue from extended use.

Additionally, you need to pay close attention to how the throttle controls on the blowers are designed. Ideally, they should be designed in such a way that it keeps your hand and wrist in their natural positions, thus reducing the level of stress and exhaustion.

This article briefly discusses the different aspects of a leaf blower that a prospective buyer needs to pay attention to when looking for the best leaf blower. Keep in mind that you have to take all of these things into consideration if you want to get the right product for your needs. This website has some great products, visit https://thebestleafblowers.com